Tuesday, 11 June 2019

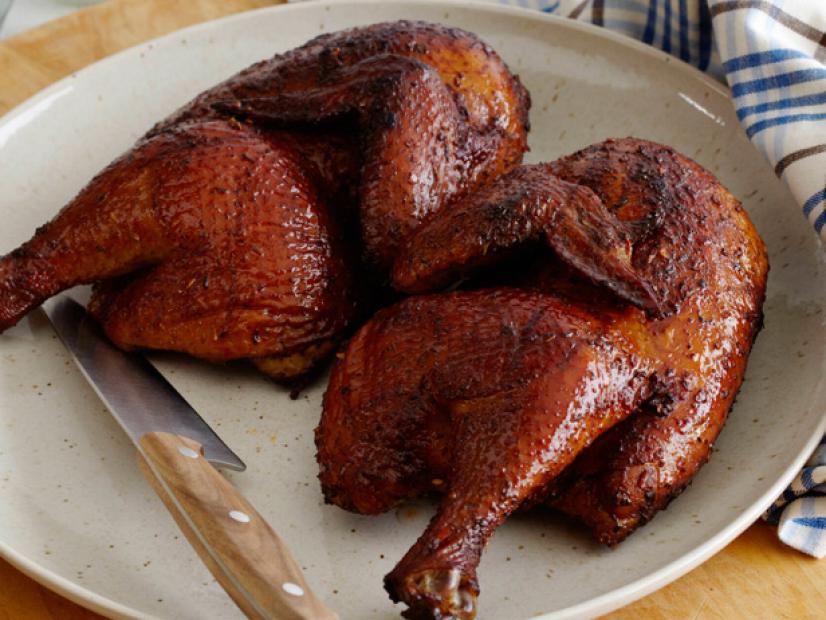
Smoked chicken

Smoked chicken

If you have never smoked a chicken you may wonder what all the fuss is about.


Maybe you think that there’s not much difference between smoking and baking where you pop the chicken into the oven for an hour and it’s ready. You can’t see any reason to spend the extra time on smoking it (or brining it, which will be explained later).


But it is not the same at all. When you do it right, a smoked chicken and a baked chicken taste like their very distant cousins. The smoked chicken will win the taste-test every time.


Reasons Why You Should Brine the Chicken


In the process of brining, a mixture of salt and other spices are mixed with water. The meat is immersed and remains in this water so that the brine and all its flavors can be absorbed.


When you smoke meat at low temperatures, the connective tissues are broken down. What you end up with is a piece of very juicy meat that melts in your mouth. You will love it and will prove to yourself that it is well worth the extra time and effort.


Tools and Equipment You Will Need


3 small chunks of dry wood used for smoking – apple, hickory, maple or cherry are the best to use with chicken
A bowl or container large enough to cover the chicken breasts with 2 quarts of water
1 water pan, lined with foil (this will be needed if you will use a charcoal grill)
Small bowl for mixing the rub mixture
Basting brush or a large spoon
An Instant-read meat thermometer
Charcoal
Chimney starter


The Brining Process


First, fill a bowl or some kind of container with 2 quarts of cold water, ½ cup of table salt and ½ cup of white sugar. Mix them well to dissolve the sugar and salt. If you would like the extra flavors, add ¼ cup of soy sauce and a bit of lemon juice and olive oil. This is your brine mixture. Mix them together well, then set it aside.


Next, place the chicken pieces into the brine. All of the pieces should be fully covered by the water. If possible, leave them in the brine overnight to allow them to soak up as much flavor and moisture as possible. However, they can be brined for as little as 30-60 minutes and they will be ready to smoke.


PRO TIP:
You will want to keep the chicken in the refrigerator at all times unless it’s being prepared for the brine or the rub. Aside from health and safety issues, cold meat will absorb the flavors from the smoke much better than meat that has cooled down to room temperature. It will be best to leave it in the refrigerator until the last minute, taking it out just before setting the chicken on the grill.


Apply the Rub to the Chicken


When you’re ready to start grilling, remove the chicken from the refrigerator and take it out of the brine. Dry each piece with paper towels, removing as much water as you can. This will allow the rub to stick to the chicken while it’s smoking.


With the chicken over a bowl or baking sheet, use a spoon to generously cover it and use your hands, rub the spices into the meat. Be sure the whole piece is completely covered.


If the grill is still heating up, return the chicken to the refrigerator.


Prepare the grill for smoking


Fill the chimney of the smoker completely with charcoal with a few pieces placed into the firebox. Light the charcoal and allow it to heat up for about 15 minutes. Both the chimney baffles and the intake should be left open. Wait for it to reach a temperature of 225°F. Before the grill reaches 225°F, lubricate the grill rack with a little bit of canola oil. You can do this with tongs and paper towels that have been dipped in the oil.


This should be done on a clean grill. If it’s not clean, scrub it with a wire brush after it’s begun to heat up, making it easier to brush away any of the old grease that was left from the last time you grilled. Now you can begin to place the wood pieces over the charcoal.


The three vents at the bottom of the grill must be wide open. The top vent also needs to be left open. The foil-lined water pan should be placed on the grill. Put a few hot coals near the pan to make a place for indirect and direct cooking.


Now add the chunks of wood to the charcoal in your preheated grill.


Friday, 24 May 2019

Eggplant with tomato and garlic sauce


Step #1: Thoroughly wash the eggplants and partly remove the skin by peeling them to look like stripes. Fry with the potatoes in sunflower oil and drain on a kitchen towel once cooked.


Step #2: In a separate pan, fry the onions and garlic until transparent. Add green peppers, tomatoes, bouquet garni (the 3 sprigs of parsley, the sprig of thyme, and the small bay leaf), tomato paste, pepper paste, allspice and salt, along with 1 cup of water. Bring to a boil on low heat.


Step #3: When the tomatoes change color (after about 5 minutes of cooking), remove the bouquet garni, and pour half of the sauce into a baking dish. Make a cut lengthwise in the center of the eggplants and insert garlic clove in each.


Step #4: Place the eggplants and potatoes on top of the tomato sauce in the baking dish and top off with the remainder of the sauce. Cook for 30 minutes in a preheated 350º F oven. Serve warm and garnish with spring onion.


More recipes eggplant.

Wednesday, 15 May 2019

Shrimp scampi recipe

Shrimp scampi recipe

Melissa Clark


  • Yield 4 servings

  • Time 15 minutes


David Malosh for The New York Times


Scampi are tiny, lobster-like crustaceans with pale pink shells (also called langoustines). Italian cooks in the United States swapped shrimp for scampi, but kept both names. Thus the dish was born, along with inevitable variations.


This classic recipe makes a simple garlic, white wine and butter sauce that goes well with a pile of pasta or with a hunk of crusty bread. However you make the dish, once the shrimp are added to the pan, the trick is to cook them just long enough that they turn pink all over, but not until their bodies curl into rounds with the texture of tires.


Ingredients


  • 2 tablespoons butter

  • 2 tablespoons extra-virgin olive oil

  • 4 garlic cloves, minced

  • ½ cup dry white wine or broth

  • ¾ teaspoon kosher salt, or to taste

  • ⅛ teaspoon crushed red pepper flakes, or to taste

  • Freshly ground black pepper

  • 1 ¾ pounds large or extra-large shrimp, shelled

  • ⅓ cup chopped parsley

  • Freshly squeezed juice of half a lemon

  • Cooked pasta or crusty bread


Email Grocery List

Preparation


  1. In a large skillet, melt butter with olive oil. Add garlic and sauté until fragrant, about 1 minute. Add wine or broth, salt, red pepper flakes and plenty of black pepper and bring to a simmer. Let wine reduce by half, about 2 minutes.

  2. Add shrimp and sauté until they just turn pink, 2 to 4 minutes depending upon their size. Stir in the parsley and lemon juice and serve over pasta or accompanied by crusty bread.


More from 66 >

Sheet-Pan Roasted Salmon Niçoise Salad


Buttermilk-Marinated Roast Chicken


By Samin Nosrat


About 1 3/4 hours, plus overnight marinating


Tuesday, 16 April 2019

Diane - s tapenade


This is such a simple recipe to put together. And that basically that is all you do. Just assemble your ingredients first then blend and chill. It’ s likely that you have all the ingredients at home most of the time. Check your pantry shelf and bring in the ingredients you don’t already have. You will always have this wonderful tapenade at your fingertips. It is elegant and delicious.


Putting dips and sauces in attractive serving dishes really really can set the mood you are trying to create I think plain white serving pieces for the hors d’oeuvres or appetizers are great. It is all in how attractive you choose to make it look. Try low sided bowls when you can so guests can more easily see what you have offered. Make designs with veggies on a plate, straighten all the crackers in holder or plate ( nicely arranged). Always provide a spreader if needed. And napkins and small plates. All these things you can easily have in your pantry. Try to use real plates, instead of plastic or paper. Well Di, I think you can guess , this a GREAT recipe in my book Here goes…..


  • 1/2 small onion

  • 4 oz. can chopped black olives

  • 2 oz. can anchovies

  • 3 Tablespons Capers

  • 1 Tablespoon chopped garlic

  • 2 Tablespoons Fresh lemon juice

  • 1 teaspoon Dijon mustard

  • 1/2 teaspoon Black pepper


  1. Put all ingredients in (except the olive oil mixture) blender.


Drain oil off anchovies and add enough live oil to make 1/3 cup and pour through hole in processor lid whie blending.


Chill and serve with white corn chips, or any cracker, bread piece and so on and so on. Pretty much this delicious recipe is very versatile. You will make it time and time again. Thanks Di.


More recipes tapenade.

Wednesday, 3 April 2019

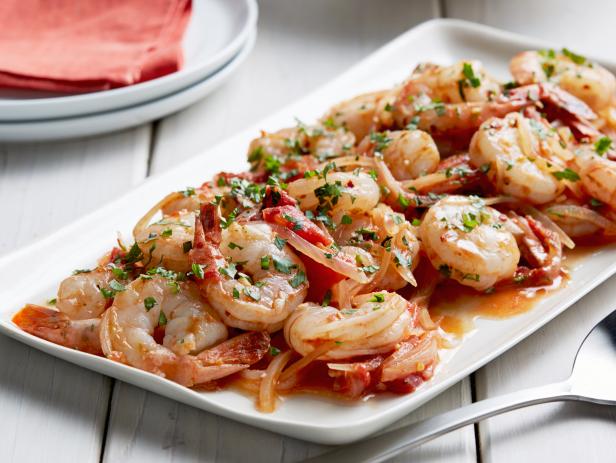
Shrimp fra diavolo

Shrimp fra diavolo

Get weekly recipes and ingredients delivered.


Feeling a little devilish tonight? Then you’ll love our take on this classic Italian-American pasta dish. The name fra diavolo, or “brother devil,” comes from the crushed red pepper that gives the tomato sauce its heat (though you can use as much or as little as you like). Sweet, succulent shrimp are an excellent pairing for the spicy sauce. And since we couldn’t resist the play on good and evil, we’re tossing the sauce with superfine angel hair pasta (get it?) and serving with cheesy Asiago-garlic bread. It’s clever (at least we think so!), but also downright delicious.


Monday, 11 March 2019

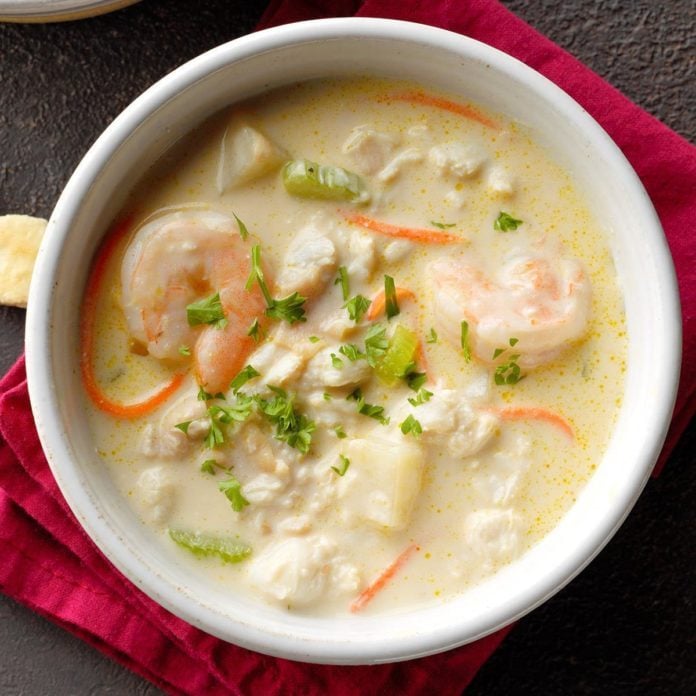
Seafood chowder

Seafood chowder

A chunky, creamy soup with salmon and smoked haddock, mixed shellfish and potatoes - a hearty meal


Nutrition and extra info


Nutrition: per serving


  • kcal 422

  • fat 19g

  • saturates 6g

  • carbs 21g

  • sugars 9g

  • fibre 4g

  • protein 41g

  • salt 2.3g


Ingredients


  • 1 tbsp vegetable oil

  • 1 large article" data-tooltip-w >onion, chopped

Onion


Onions are endlessly versatile and an essential ingredient in countless recipes. Native to Asia…


New potatoes


New potatoes have thin, wispy skins and a crisp, waxy texture. They are young potatoes and…


One of the most widely used ingredients, milk is often referred to as a complete food. While cow…


Parsley


One of the most ubiquitous herbs in British cookery, parsley is also popular in European and…


Method


Heat the oil in a large saucepan over a medium heat, then add the onion and bacon. Cook for 8-10 mins until the onion is soft and the bacon is cooked. Stir in the flour, then cook for a further 2 mins.


Pour in the fish stock and bring it up to a gentle simmer. Add the potatoes, cover, then simmer for 10-12 mins until the potatoes are cooked through.


Add the mace, cayenne pepper and some seasoning, then stir in the milk.


Tip the fish pie mix into the pan, gently simmer for 4 mins. Add the cream and shellfish, then simmer for 1 min more. Check the seasoning. Sprinkle with the parsley and serve with some crusty bread.


Thursday, 14 February 2019

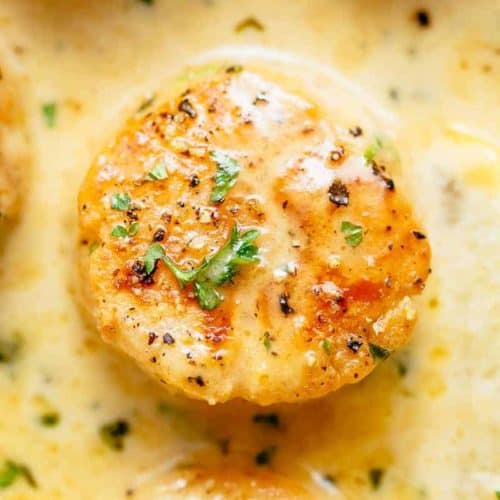
Scallops recipe

Scallops recipe

Pan Seared Scallops Recipe: Sizzling Scallop Scampi is luxurious, yet so easy to make. Serve these pan seared scallops with your favorite s >


Scallops


Today I’m serving up a super fast Pan Seared Scallops Recipe that pairs well with salads, grilled veggies, rice, pasta or anything else you decide to whip up on the side.


It’s hard to stay motivated to cook this time of year, even for me. I want to be outside in the sunshine, now that it doesn’t get dark until after 8 o’clock.


In fact, I don’t even want to think about dinner plans until after 6:30 or 7 pm. That means I need to rely on fast fresh meals that take only minutes to make.


But trust me, these scallops will definitely be the show-stopper on the table!


Seared Scallop Scampi Ingredients


This truly is a simple and quick recipe that doesn’t need a lot of ingredients. My guess is that the only thing you’ll have to pick up at the store is the scallops!


Here’s what you’ll need:


  • Colossal Diver Scallops – The main star of this dish. Pick the biggest freshest scallops you can find.

  • Oil – To keep the protein from sticking to the pan.

  • Butter – For luxurious flavor and a silky texture.

  • Garlic – For herby flavor!

  • Lemon Zest – Fish always goes well with a bit of citrus.

  • Lemon Juice – See above

  • Saltand Pepper – For taste.

  • Parsely – For garnish and color.


How To Cook Scallops


To make this recipe, start with large fresh scallops. Dry them well and remove the little flap on the side of each scallop. It will turn tough once cooked.


Get a skillet smoking-hot, and brush or rub it with a scant amount of oil to coat the surface.


Pan Seared Scallops


Then sear the scallops for only 1-2 minutes per side, so that they are caramelized on the flat sides, but just barely cooked through in the center. When overcooked, scallops turn rubbery.


Once cooked, add a little butter, garlic, lemon juice, zest, and parsley, then toss to coat.


Done! Really, that’s all there is to it.


Side Dishes


This main dish is paired well with a wide variety of sides including salads, rice, pasta, and grilled veggies. Here are some of our favorite recipes to make alongside Pan Seared Scallops.


Quick and Simple


This Pan Seared Scallops Recipe tastes just as good, if not better than scallops you would order in a restaurant, yet takes only minutes to make.


They are perfect for a quick mid-week dinner, or to serve at a weekend dinner party with friends.


This recipe is a life-saver this time of year. It’s gluten free, packed with flavor, and you only have one pan to wash in the end.


Recipes like this are what keep me cooking all through the spring and summer.